How I found out about the format of voice messages
It all started when I discovered how to send any audio as a voice message; it was enough to create a female persona named Kristina.
At first I used voices available on the internet; after getting bored with it, I started merging multiple audio clips into one. Later, instead of just using prerecorded audio tracks, I began generating a voice using RVC.
Using RVC to generate voice
I send a voice message, the bot downloads it, connects via websockets to the RVC, RVC converts the audio, and the bot sends a voice message back. Because cli didn't work for me, I had to reverse-engineer websockets.
public async Task<string> FeminizeAudio(FeminizeData feminizeData, string voicePath) {
  var exitEvent = new ManualResetEvent(false);
  var url = new Uri("ws://localhost:7865/queue/join");
  var outputPath = string.Empty;

  using (var client = new WebsocketClient(url)) {
    client.ReconnectTimeout = TimeSpan.FromSeconds(30);
    client.ReconnectionHappened.Subscribe(info => Console.WriteLine($"Reconnection happened, type: {info.Type}"));

    await client.SendInstant($"{{"fn_index":2,"session_hash":"{_hash}"}}");

    client.MessageReceived.Subscribe(async msg => {
      Console.WriteLine($"Message received: {msg.Text}");

      if (msg.Text.Contains("send_hash")) {
        await client.SendInstant($"{{"fn_index":2,"session_hash":"{_hash}"}}");
      } else if (msg.Text.Contains("send_data")) {
        if (voicePath != _previousVoicePath) {         //Load new voice weights only if path has changed
          object[] data = new object[3];

          data[0] = _configLoader.GetConfigName(voicePath);
          Console.WriteLine($"[{nameof(Feminizer)}] [{nameof(FeminizeAudio)}] Voice has changed, loading another pth {_configLoader.GetConfigName(voicePath)}");

          data[1] = new SelectVoice() { visible = true, value = 0.33f, __type__ = "update" };

          data[2] = new SelectVoice() { visible = true, value = 0.33f, __type__ = "update" };

          var jsonObject = new { data, event_data = (object)null, fn_index = 5, session_hash = $"{_hash}" };

          string json = JsonConvert.SerializeObject(jsonObject);
          Console.WriteLine(json);

          await client.SendInstant(json);
        } else {
          var data = _configLoader.GetConfig(voicePath);
          Console.WriteLine($"[{nameof(Feminizer)}] [{nameof(FeminizeAudio)}] Voice has NOT changed, using {_configLoader.GetConfigName(voicePath)} Path {feminizeData.path}");

          data[1] = feminizeData.path;
          data[2] = feminizeData.pitch;
          var jsonObject = new { data, event_data = (object)null, fn_index = 2, session_hash = $"{_hash}" };

          string json = JsonConvert.SerializeObject(jsonObject);

          await client.SendInstant(json);
        }
      } else if (msg.Text.Contains("process_starts")) {
        Console.WriteLine($"Process started {msg.Text}");
      } else if (msg.Text.Contains("process_completed")) {
        if (_previousVoicePath != voicePath) {
          Console.WriteLine("Changing voice type");
          _previousVoicePath = voicePath;
          return;
        }

        Console.WriteLine("Process completed");
        Console.WriteLine(msg.Text);
        ProcessCompletedResponse response = JsonConvert.DeserializeObject<ProcessCompletedResponse>(msg.Text);

        foreach (var item in response.Output.Data) {
          if (item is string) {
            Console.WriteLine("String data: " + (string)item);
          } else if (item is JObject) {
            DataItem dataItem = ((JObject)item).ToObject<DataItem>();
            Console.WriteLine("File data: " + dataItem.Name);
            outputPath = dataItem.Name;
            break;
          }
        }

        exitEvent.Set();
      }
    });

    await client.Start();
    exitEvent.WaitOne();
  }

  return outputPath;
}
Convert audio to an audio message with the correct waveform data
var conversion = FFmpeg.Conversions.New()
            .AddParameter($"-i {inputFilePath}")
            .AddParameter("-vn -ac 1 -map 0:a -codec:a opus -b:a 128k -vbr off -strict -2")
            .SetOutput(outputFilePath).SetOverwriteOutput(true);

await conversion.Start();
Fixing RVC on RTX 50 series
After upgrading from a GTX1660 to an RTX5070TI I faced another issue: RVC didn't support the 50 series. Luckily, I've found an unmerged pull request with fixes and explanation of how to make the 50 series work with RVC. I forked the main repo, followed the instructions, and now it works! Nowadays the latest version of RVC should have proper 50 series support.
Sending any video as a video note
In the meanwhile, I was happy with the result, so I started looking into api and documentation and found out that a video can be sent as a video message. The video should have a 1:1 square ratio and have a resolution between 360 and 639. Made another bot that receives a video and sends a video message back. Later bumped the resolution to 639x639 but had to make the video message twice as short, otherwise Telegram complained about the file size.
public async Task ConvertToVideoMessages(string inputFilePath, string outputPath) {

  var mediaInfo = await FFmpeg.GetMediaInfo(inputFilePath);

  const int desiredWidth = 639;  // desired width
  const int desiredHeight = 639; // desired height

  var inputWidth = 0;
  var inputHeight = 0;

  foreach (var videoStream in mediaInfo.VideoStreams) {
    inputWidth = videoStream.Width;
    inputHeight = videoStream.Height;
  }

  // Check if video is vertical (like YT Shorts)
  // bool isVertical = inputHeight > inputWidth;

  // For horizontal videos, use the original scaling and crop logic
  var widthRatio = (float)desiredWidth / inputWidth;
  var heightRatio = (float)desiredHeight / inputHeight;
  var scale = Math.Max(widthRatio, heightRatio);
  var newWidth = (int)(inputWidth * scale);
  var newHeight = (int)(inputHeight * scale);
  var padX = (newWidth - desiredWidth) / 2;
  var padY = (newHeight - desiredHeight) / 2;
  var scaleAndCropFilter = $"scale={newWidth}:{newHeight},crop={desiredWidth}:{desiredHeight}:{padX}:{padY}";

  var duration = mediaInfo.Duration.TotalSeconds;
  var clipDuration = 30;

  try {
    if (duration > clipDuration) {
      var numParts = (int)Math.Ceiling(duration / clipDuration);

      for (var i = 0; i < numParts; i++) {
        var path = Path.Combine(outputPath, $"output_part_{i}.mp4");
        var startTime = i * clipDuration;
        var conversion = FFmpeg.Conversions.New()
                             .AddParameter($"-hwaccel cuda")
                             .AddParameter($"-i {inputFilePath}")
                             .AddParameter($"-c:v libx264")
                             .AddParameter($"-vf "{scaleAndCropFilter}"")
                             .AddParameter($"-pix_fmt yuv420p")
                             .AddParameter($"-ss {startTime}")
                             .AddParameter($"-t {clipDuration}")
                             .AddParameter($"-f mp4")
                             .SetOutput(path)
                             .SetOverwriteOutput(true);

        await conversion.Start();
      }
    } else {
      var fileName = Path.GetFileName(inputFilePath);
      var conversion = FFmpeg.Conversions.New()
                           .AddParameter($"-hwaccel cuda")
                           .AddParameter($"-i {inputFilePath}")
                           .AddParameter($"-vf "{scaleAndCropFilter}"")
                           .AddParameter($"-c:v libx264")
                           .AddParameter($"-pix_fmt yuv420p")
                           .AddParameter($"-t {clipDuration}")
                           .AddParameter($"-f mp4")
                           .SetOutput(Path.Combine(outputPath, fileName))
                           .SetOverwriteOutput(true);

      await conversion.Start();
    }
  } catch (Exception e) {
    Console.WriteLine(e);
    throw;
  }
}
Switching to VTubeStudio
The persona started evolving, and as a stereotype engineer, instead of using a ready-made solution that works out of the box, I started creating my own VTubeStudio. It went well until I compared features between my project and VTubeStudio and understood the scope of the project... After realizing that it would take me a couple of years to create a prototype of what VTubeStudio has already mastered, I've decided to abandon the development of this project and focus on gluing together a solution that would work with VTubeStudio.
OBS
Before porting to Linux I was using OBS to record the screen and host a virtual camera. The setup was... complicated to say the least.
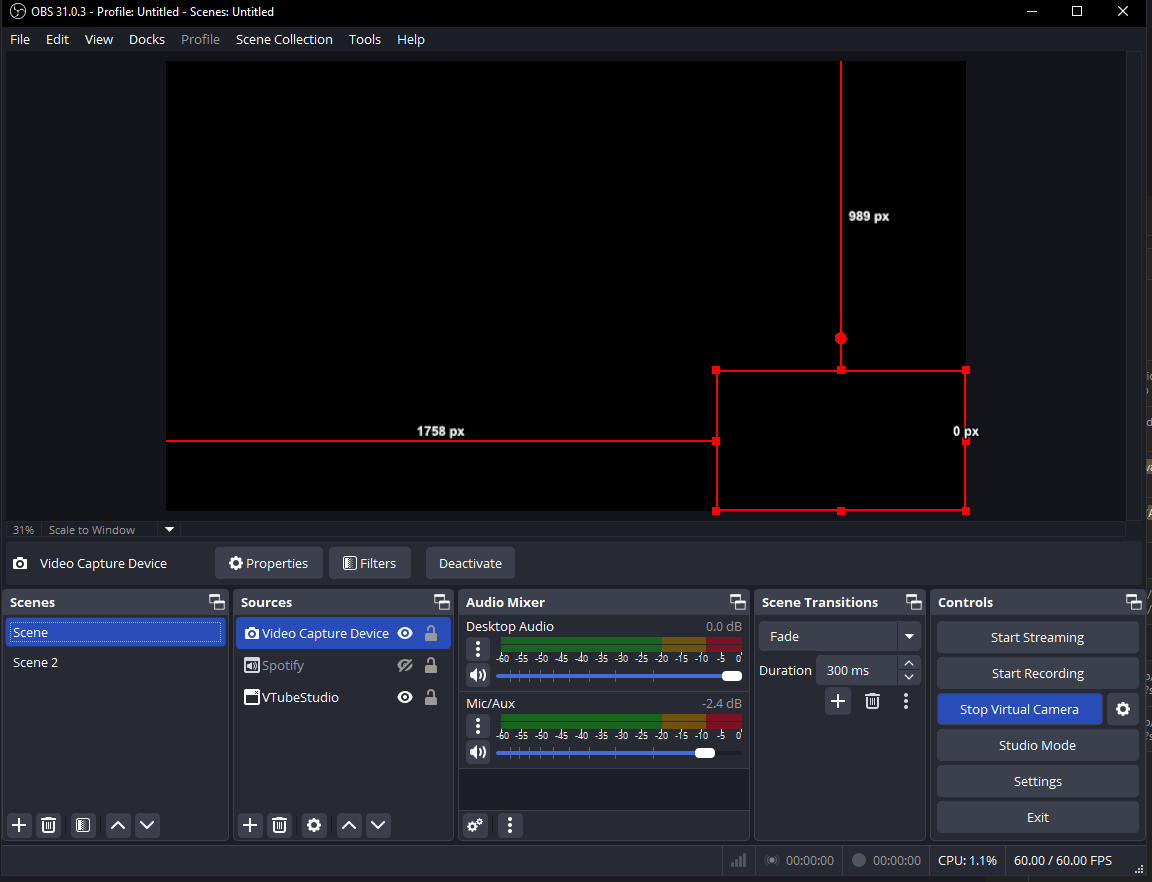
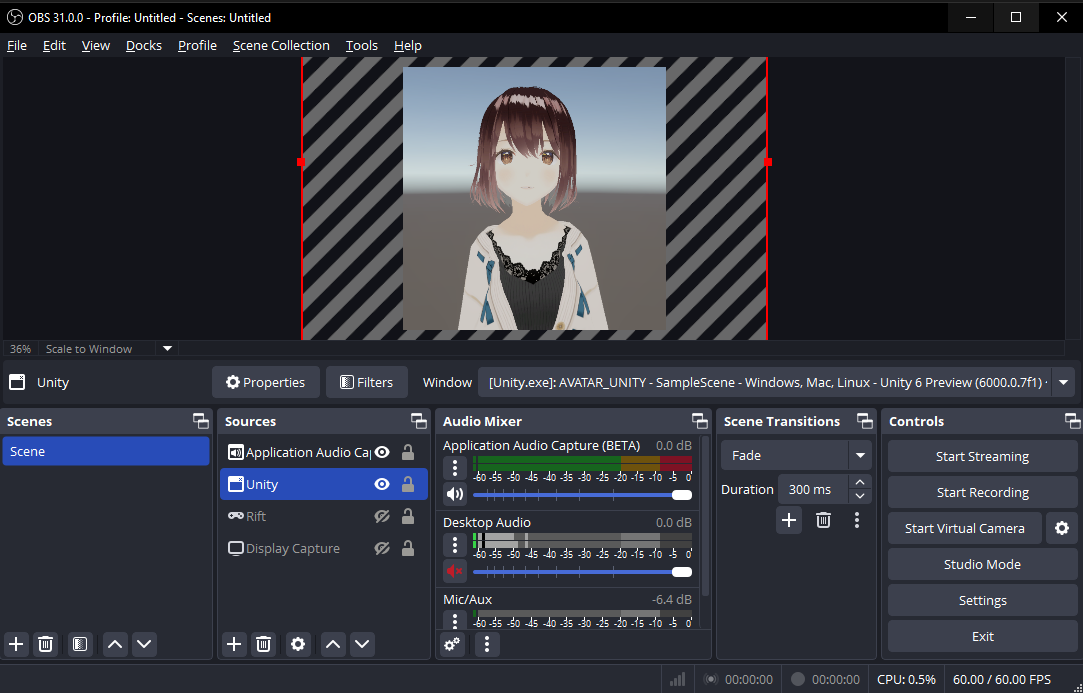
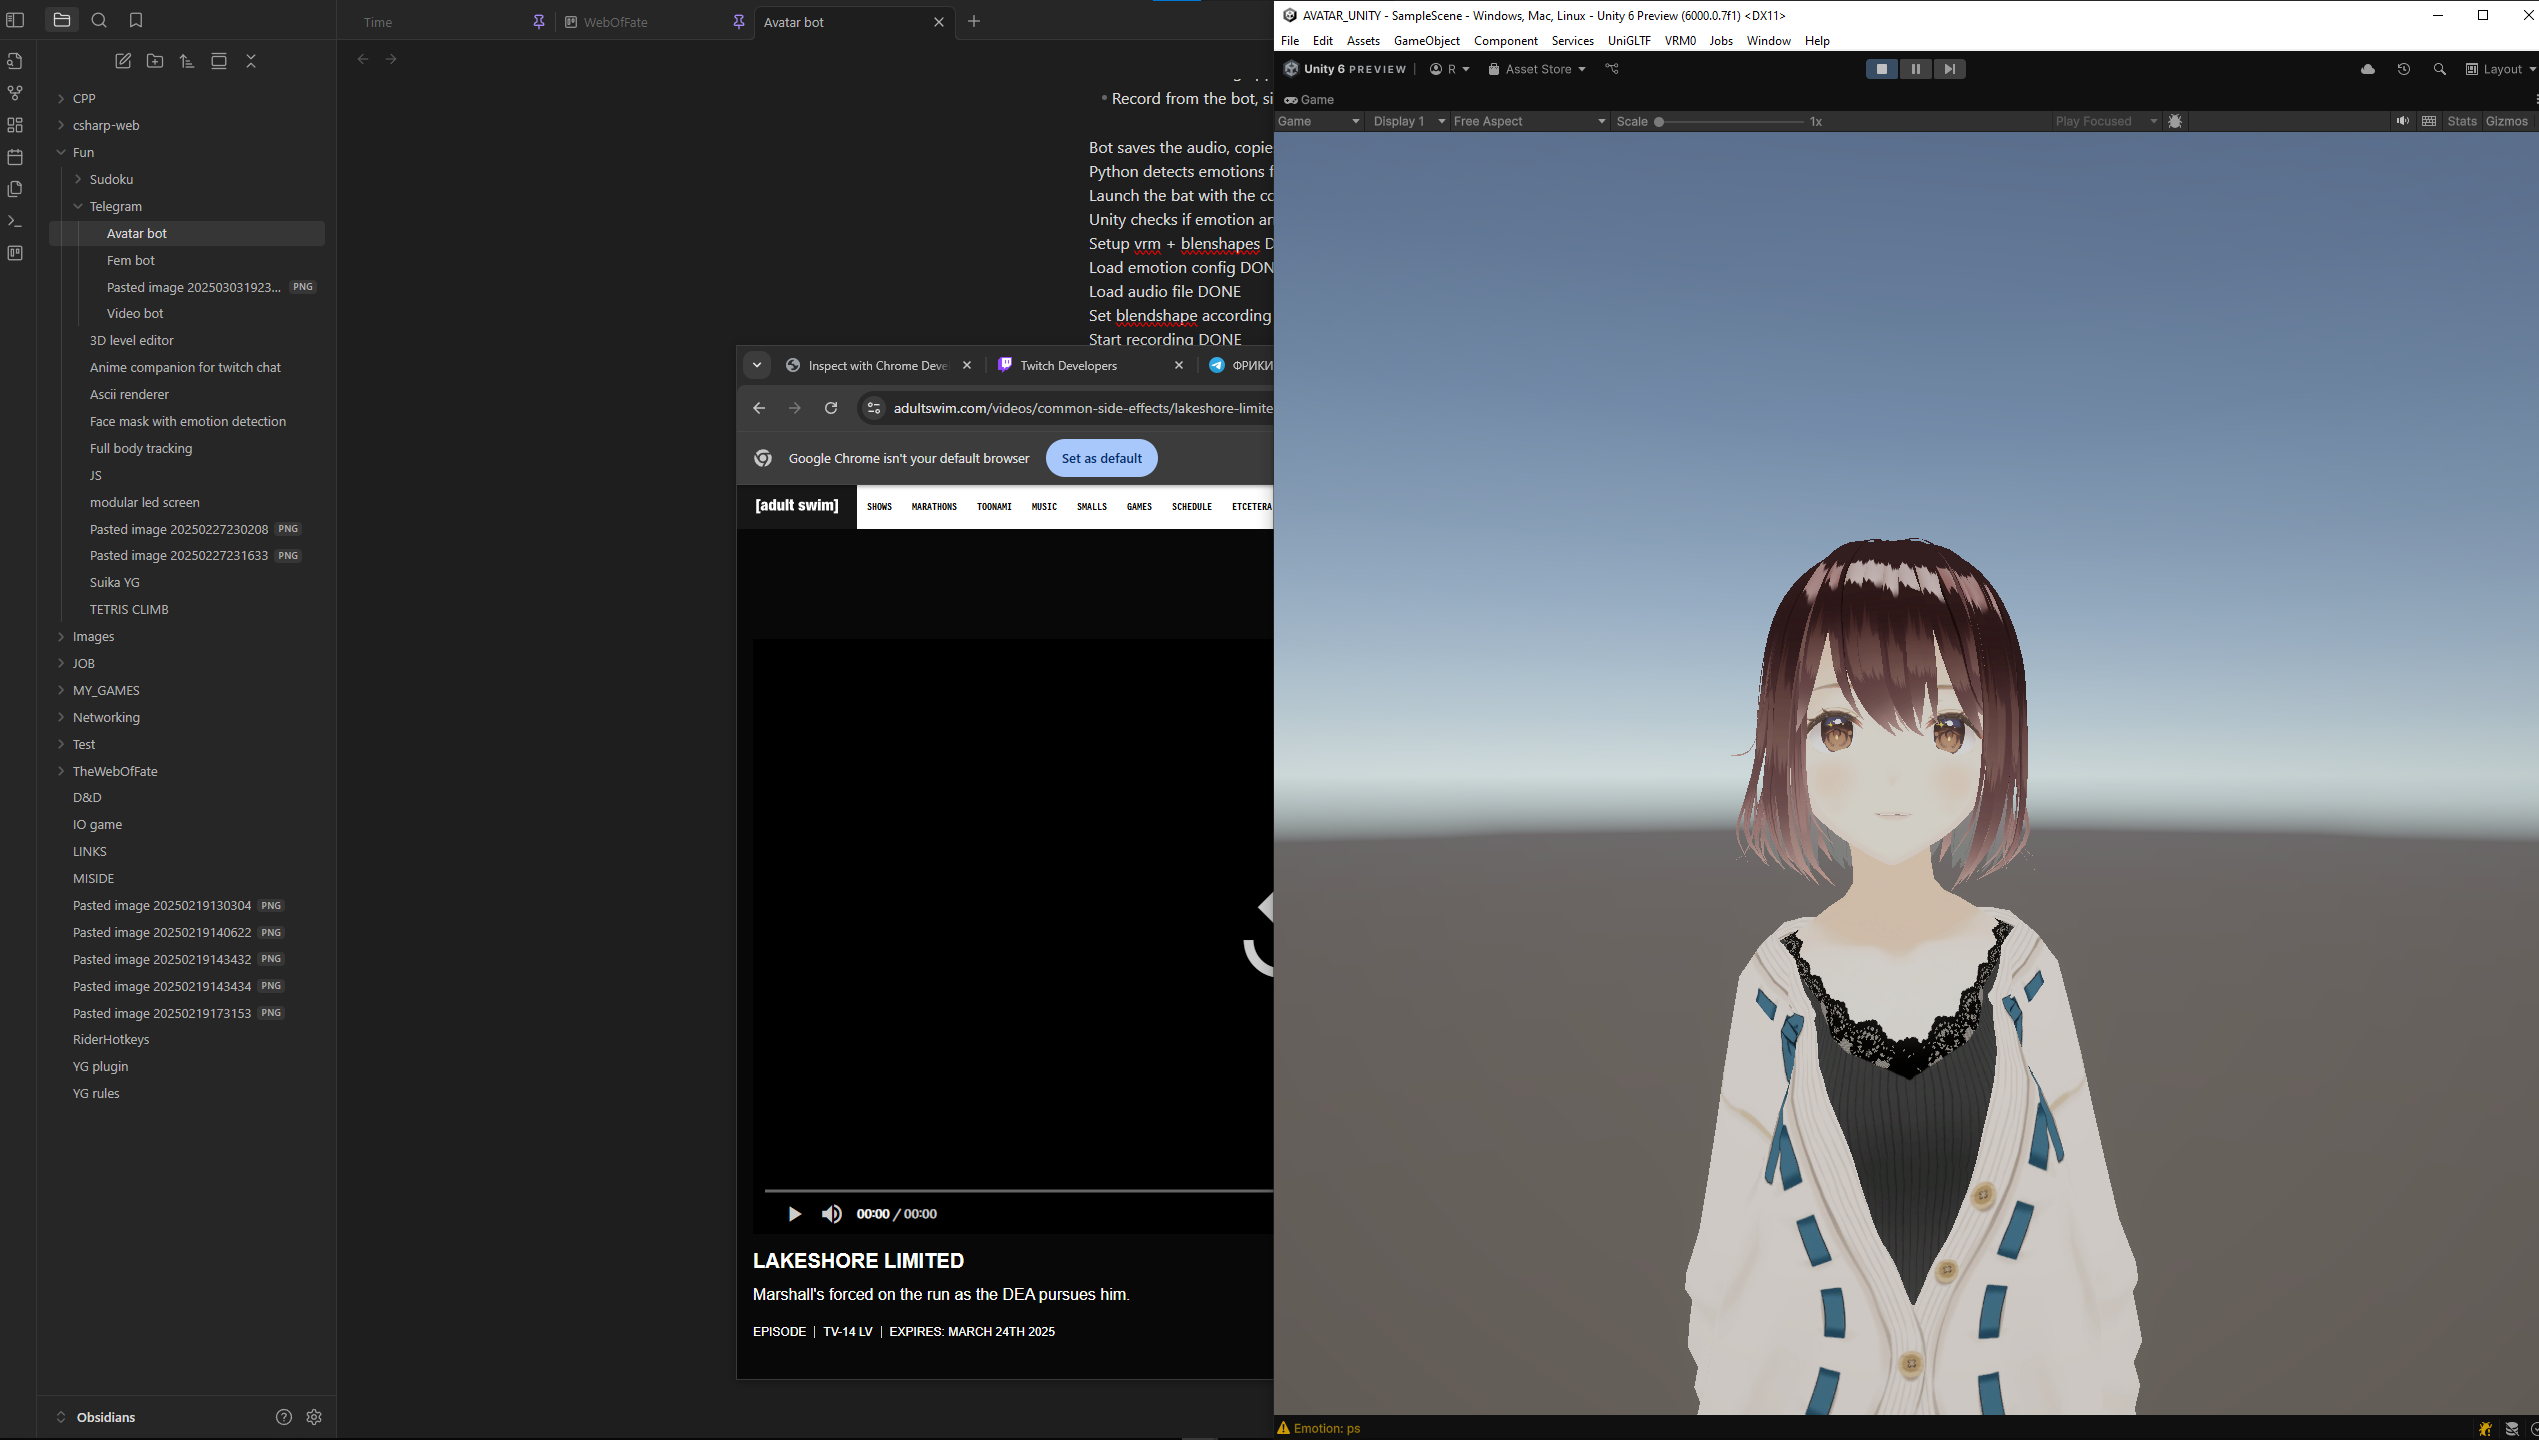
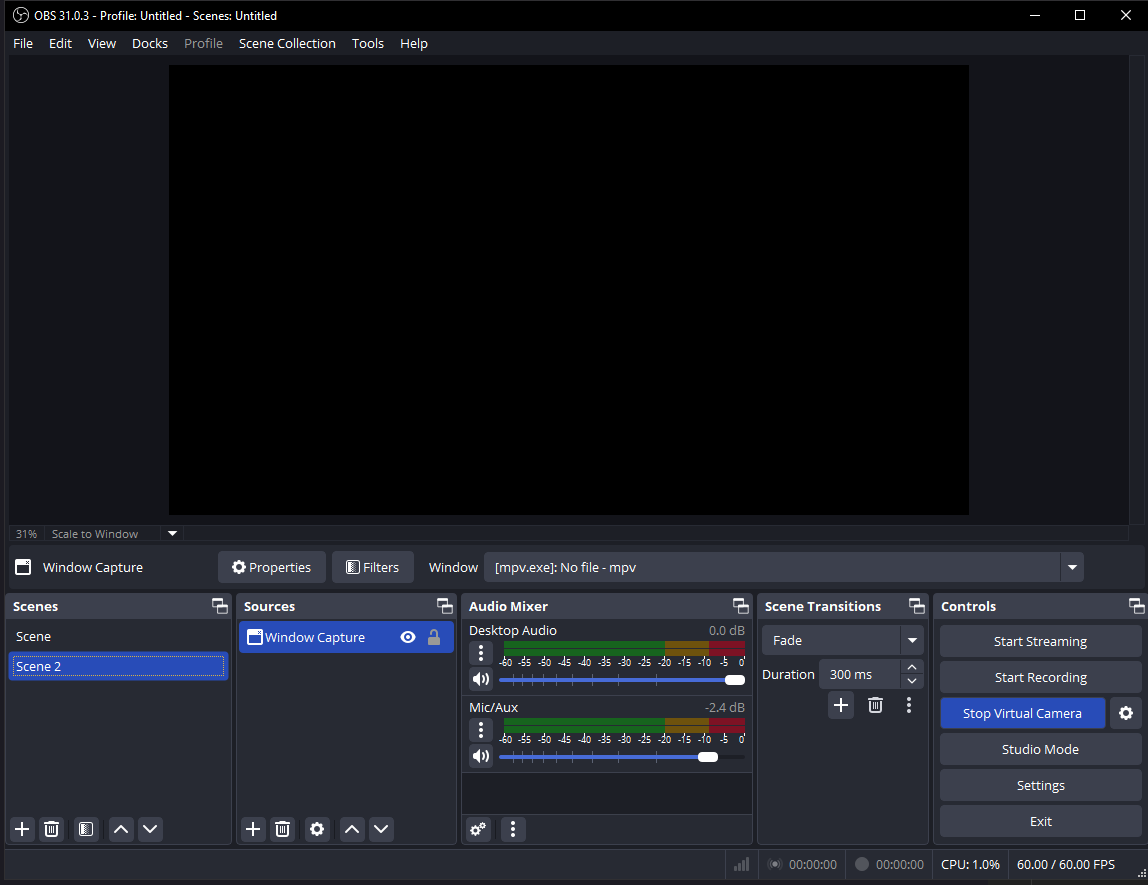
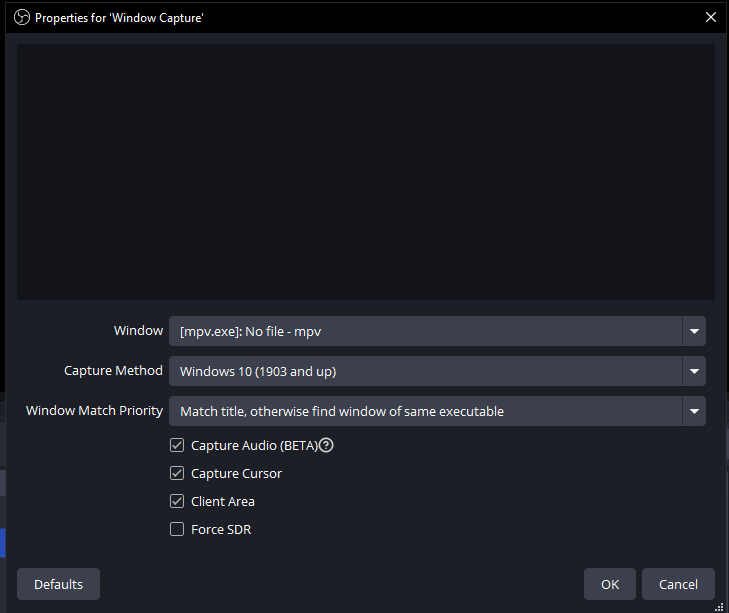
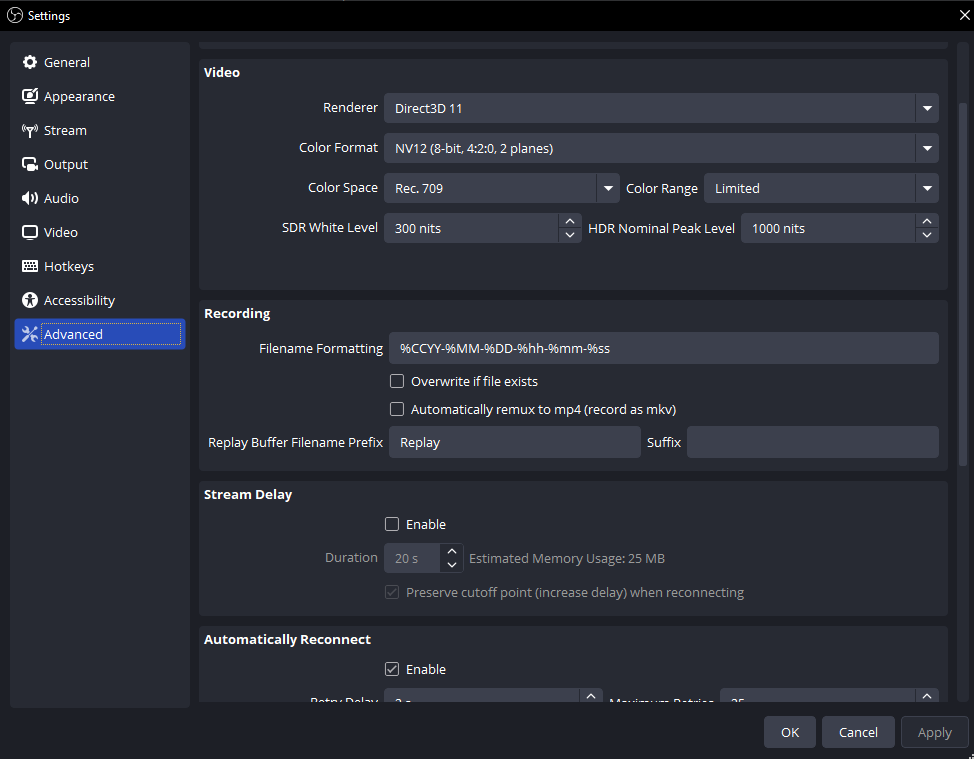
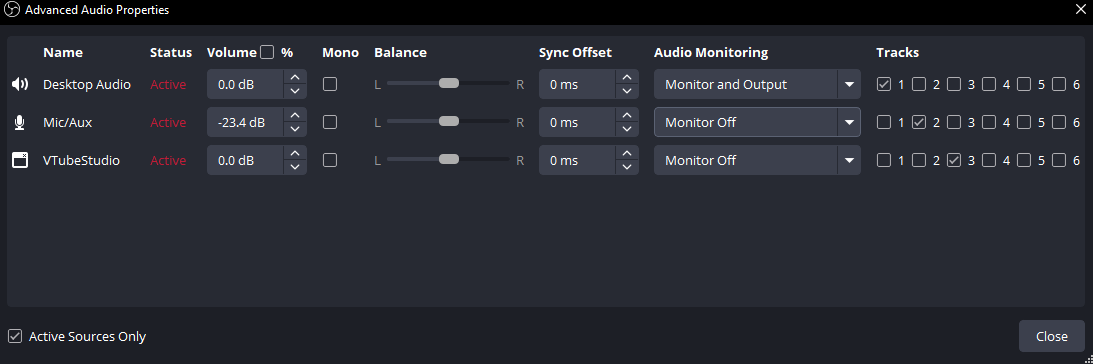
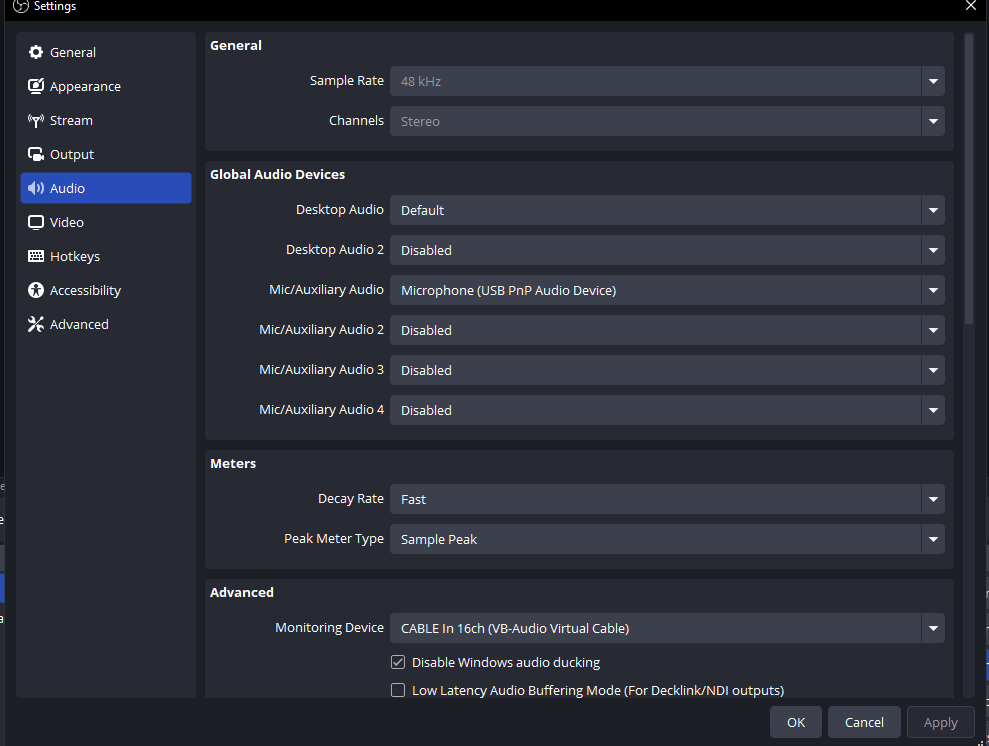
Then it would keep track of an mpv window in the second scene which would be used by the virtual camera and fed into the VTubeStudio as an input.
Merging multiple bots
At first I was utilizing the voice-change bot and created a separate one that does the VTubeStudio thing, but it was inconvenient. At first I had to send a voice message, then send it to another bot alongside the video. After refactoring, a single bot now supports both video and audio conversion.
Porting to Linux
My server pc had windows 10 LTSC installed, but it was painful, starting with endless updates and ending with crashes. Later, after switching to Linux I found out that crashes were hardware related; not only did I have to upgrade my pc, but I also had to adapt it to Linux, since OBS didn't want to work :angry:
For VTubeStudio to work. I need a virtual camera; I found an akvcam, it's a Linux-only driver with recording and output abilities, exactly what I need. But it didn't work with VTubeStudio at first, so I had to tweak the config.
Unfortunately, BBCode keeps escaping html, so there are missing slashes
/etc/akvcam/config.ini

[Cameras]
cameras\1\description=Virtual Camera (out)
cameras\1\formats=6
cameras\1\mode=rw
cameras\1\type=output
cameras\2\description=Virtual Camera
cameras\2\formats=12
cameras\2\mode=mmap, userptr
cameras\2\type=capture
cameras\size=2

[Connections]
connections\1\connection=1:2
connections\size=1

[Formats]
formats\size=12
formats\1\format=RGB24
formats\1\width=640
formats\1\height=480
formats\1\fps=30/1
formats\2\format=RGB24
formats\2\height=120
formats\2\width=160
formats\2\fps=30/1
formats\3\format=RGB24
formats\3\height=240
formats\3\width=320
formats\3\fps=30/1
formats\4\format=RGB24
formats\4\height=600
formats\4\width=800
formats\4\fps=30/1
formats\5\format=RGB24
formats\5\height=720
formats\5\width=1280
formats\5\fps=30/1
formats\6\format=RGB24
formats\6\height=1080
formats\6\width=1920
formats\6\fps=30/1
formats\7\format=YUY2, UYVY
formats\7\width=640
formats\7\height=480
formats\7\fps=30/1
formats\8\format=YUY2, UYVY
formats\8\width=160
formats\8\height=120
formats\8\fps=30/1
formats\9\format=YUY2, UYVY
formats\9\width=320
formats\9\height=240
formats\9\fps=30/1
formats\10\format=YUY2, UYVY
formats\10\width=800
formats\10\height=600
formats\10\fps=30/1
formats\11\format=YUY2, UYVY
formats\11\width=1280
formats\11\height=720
formats\11\fps=30/1
formats\12\format=YUY2, UYVY
formats\12\width=1920
formats\12\height=1080
formats\12\fps=30/1
With that out of the way, I had another issue: FFMPEG didn't want to stream to the camera. To resolve this, all I had to do was change one line.
cameras\2\mode = rwThen FFMPEG caused flickering while recording the desktop...
Disabling the OpenGL option "Allow Flipping" fixed it for me on Nvidia GPU and Ubuntu 24.04modprobe: ERROR: could not insert 'akvcam': Key was rejected by service
Driver doesn't have a signature, so secure boot rejects it...
Disable secure bootIf it still doesn't work need to adjust the permission for the video group
sudo id -a
sudo usermod -a -G video $LOGNAME
Test command, don't forget to adjust the camera resolution
ffmpeg -i test.mp4 -s 640x480 -r 30 -f v4l2 -vcodec rawvideo -pix_fmt rgb24 /dev/video0Linux version of VTubeStudio doesn't have a tracking software bundled with the steam installation, so it needs a setup too.
sudo add-apt-repository ppa:deadsnakes/ppa
sudo apt update
sudo apt-get install python3.9-distutils
sudo apt-get install python3-pip
sudo apt-get install python3-virtualenv
python3.9 -m pip install tomli
virtualenv -p python3.9 env
Then download OpenSeeFace
git clone https://github.com/emilianavt/OpenSeeFace
cd OpenSeeFace
virtualenv -p python39 env
source env/bin/activate
pip install onnxruntime opencv-python pillow numpy==1.26.1
Adjust the ip
Right click on Vtube Studio in your Steam Library, click on Properties > Installed Files > Browse.
Go to Vtube Studio_Data > StreamingAssets and open ip.txt (or create it if its not there).
Inside, you need two things to be correct: ip=0.0.0.0 and port=11573
Place them on new lines
Start OpenSeeFace
Default command
python facetracker.py -c 0 -W 1280 -H 720 --discard-after 0 --scan-every 0 --no-3d-adapt 1 --max-feature-updates 900

My command
python facetracker.py -c 1 -W 1280 -H 720 --discard-after 0 --scan-every 0 --no-3d-adapt 1 --max-feature-updates 900 --video-fps 30 --max-threads 16
Create a virtual microphone
#Start pulseaudio daemon
pulseaudio -D
#Create a virtual sink (the software that is the source of your audio will output to this sink)
pactl load-module module-null-sink sink_name=vspeaker sink_properties=device.description=virtual_speaker
#Remap
pactl load-module module-remap-source master=vspeaker.monitor source_name=vmic source_properties=device.description=virtual_mic
And then stream audio into it using FFMPEG
ffmpeg -i {denoisedAudioPath} -f pulse -device vmic "Stream name"It ended up more convenient on Linux; like the Windows version, it has 2 dependencies: avkcam (virtual camera driver) and ffmpeg, replacing mpv and obs. And has a less wonky setup, instead of multiple bat files and having to make sure that VTubeStudio is not minimized and OBS is focused. Now I have a couple of bash scripts, and that's it. It automatically launches everything using a single script and places VTubeStudio in the foreground when needed 😎
De-noising
As a part of merging bots and refactoring the code, I created a simple python server that handles audio de-noising instead of having de-noise built into the RVC.
@app.route('/denoise', methods=['POST'])
def denoise():
    # Read JSON body from the request
    data = request.get_json()
    # Extract the URL or any other parameters you need
    audio_path = data.get('source_audio_file_path')
    # Initialize model and state
    model, df_state, _ = init_df()
    # Load audio
    audio, _ = load_audio(audio_path, sr=df_state.sr())
    # Denoise the audio
    enhanced = enhance(model, df_state, audio)
    # Save for listening
    audio_output_path = data.get('output_audio_file_path')
    save_audio(audio_output_path, enhanced, df_state.sr())

    # Prepare the response
    response = {
        "message": "Successfully denoised audio",
        "status": "success"
    }

    return jsonify(response), 200
A dedicated python server would allow for an easier integration of various python libs in the future
Faster than real-time
While audio processing works 20x faster than real-time, video processing does not. So I decided to speed up the input video by a factor of two and slow down the resulting video by the same factor.
public async Task SpeedUpBy(string videoPath, string outputPath, int times) {
  var conversion =
      FFmpeg.Conversions.New()
          .AddParameter($"-i {videoPath} -vf "setpts = PTS / {times}" -af "atempo = {times}" -c:v libx264 -c:a aac")
          .SetOutput(outputPath)
          .SetOverwriteOutput(true);
  await conversion.Start();
}

public async Task SlowDownBy(string videoPath, string outputPath, int times) {
  var conversion =
      FFmpeg.Conversions.New()
          .AddParameter($"-i {videoPath} -vf "setpts = PTS * {times}" -af "atempo = {times * 0.5}" -c:v libx264 -c:a aac")
          .SetOutput(outputPath)
          .SetOverwriteOutput(true);
  await conversion.Start();
}
Getting emotional
It's possible to set an emotion or an expression using either a face feature or a hotkey. The former is usually used to add accessories or an expression; the latter is used for face expressions. SharpHook made it possible to simulate a key input to choose an accessory or an expression.
if (message.Text.StartsWith("/emotion")) {
  message.Text = message.Text.Replace("/emotion", "");
  if (int.TryParse(message.Text, out var emotion)) {
    switch (emotion) {
    case 1:
      _eventSimulator.SimulateKeyPress(KeyCode.VcNumPad1);
      _eventSimulator.SimulateKeyRelease(KeyCode.VcNumPad1);
      break;
    case 2:
      _eventSimulator.SimulateKeyPress(KeyCode.VcNumPad2);
      _eventSimulator.SimulateKeyRelease(KeyCode.VcNumPad2);
      break;
    case 3:
      _eventSimulator.SimulateKeyPress(KeyCode.VcNumPad3);
      _eventSimulator.SimulateKeyRelease(KeyCode.VcNumPad3);
      break;
    case 4:
      _eventSimulator.SimulateKeyPress(KeyCode.VcNumPad4);
      _eventSimulator.SimulateKeyRelease(KeyCode.VcNumPad4);
      break;
    case 5:
      _eventSimulator.SimulateKeyPress(KeyCode.VcNumPad5);
      _eventSimulator.SimulateKeyRelease(KeyCode.VcNumPad5);
      break;
    case 6:
      _eventSimulator.SimulateKeyPress(KeyCode.VcNumPad6);
      _eventSimulator.SimulateKeyRelease(KeyCode.VcNumPad6);
      break;
    default:
      await _bot.SendMessage(message.Chat.Id, "Unsupported emotion");
      break;
    }

    Console.WriteLine("Set emotion to " + emotion);
  }
It's also possible to read a json config file for a model and dynamically parse values, but it's a feature for the next update, I guess.